Unlike other operating systems, Kodi is more complicated to set up on the Apple TV. Kodi is currently not available in the app store, so you have to manually go to the tv OS settings and configure Kodi accordingly. Kodi is an amazing service that provides more fluid responsiveness with Apple TV.
How to Install Kodi on Apple TV HD
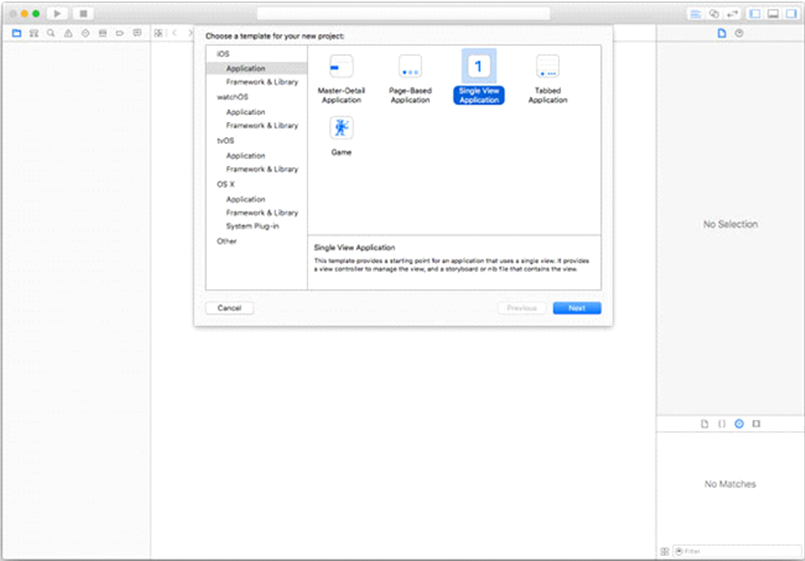
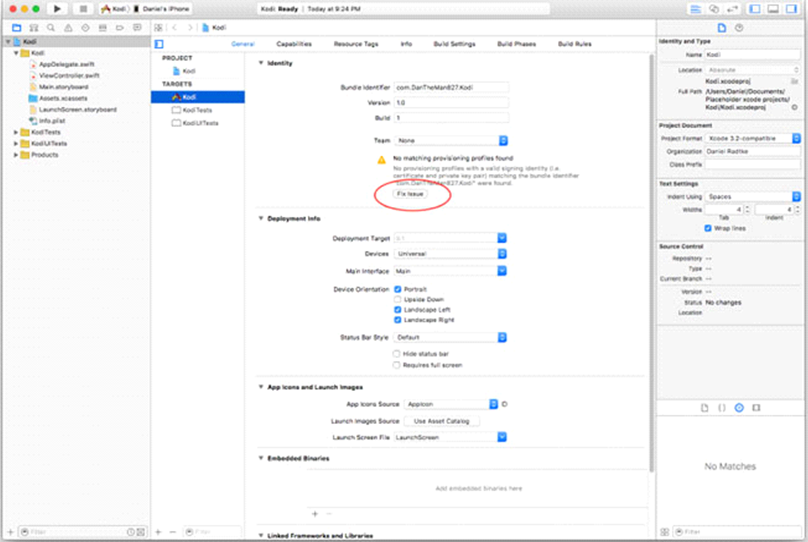
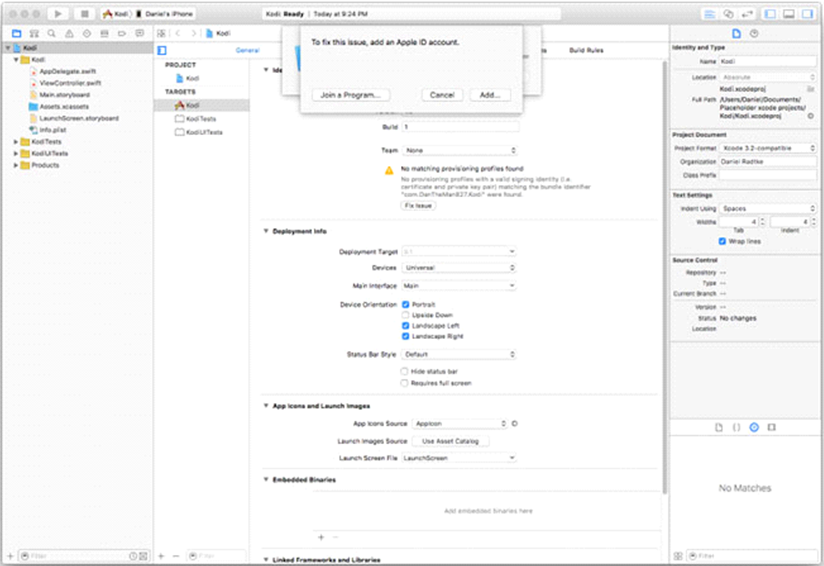
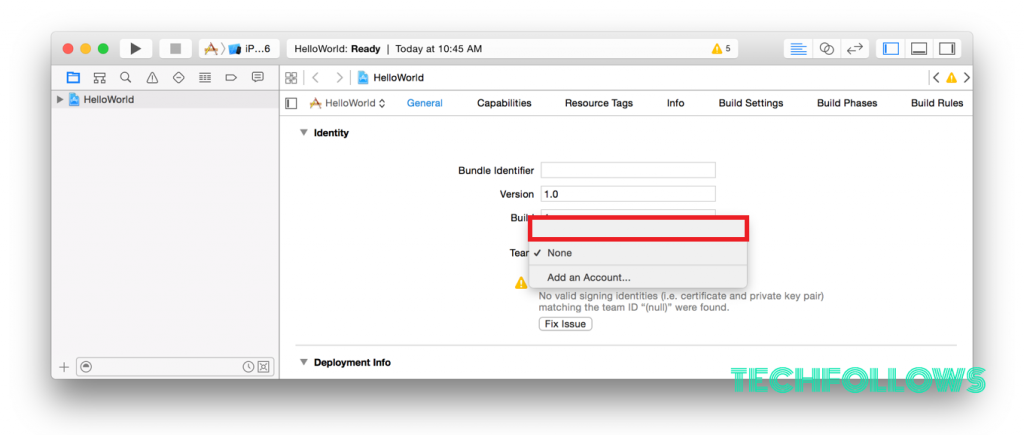
1: Using a USB cable, connect the Apple TV device to your Mac. 2: Open Xcode on your Mac. 3: Click on tvOS and then on Application using. 4: Click on the Single View Application option and click on Next. 5: You need to name the app, say Kodi, and then provide a unique identifier. 6: If a warning appears on Xcode regarding the absence of a provisioning file, select Fix Issue. 7: Enter your Apple ID, either Standard or Developers. Note: If you use Standard ID, then you need to re-install Kodi every seven days. However, you can use it for one year if you have a Developer’s ID. 8: Launch the iOS App Signer. 9: On the Input File field, scroll to the installation file of Kodi. 10: Enter Kodi on the App Display Name field and then click on Start. 11: Give some time for the iOS App Signer to unpack the installation data of Kodi and then save a new file. 12: Open Xcode and click on the Window option on the menu bar on top. 13: Click on the Devices option. 14: Navigate to your Apple TV on the sidebar and click on the + button on the right side. 15: Find the Kodi file that is newly created. 16: Xcode will finish the process on its own, and it takes some time. 17: Once done, disconnect Apple TV from Mac. 18: Connect Apple TV to your TV and turn it on. 19: You can find that Kodi is available in the app after successful installation.
How to Install Kodi on Apple TV 4 and 4k?
Just follow the steps given below to install Kodi on your Apple TV. 1: Before getting started just make sure that you have the following files:
Xcode 7.2 or later (free) iOS App Signer utility for Mac (free) The latest Kodi .deb file for tvOS (free) Free Apple Developer account
2: Connect your Apple TV 4 and 4k to Mac with the USB-C to USB-A cable. 3: After connecting, launch Xcode and choose to “Create a new Xcode project“ 4: Then navigate through the Application >Single View Application>Next. 5: Just fill in the details for the ‘new project‘ and provides it a product name, Bundle Identifier, organisation name. After finishing all these clicks Next. 6: Now you can see the error message, which appears on the main Xcode window, stating that the software cannot find the “matching provisioning profile”. Just click Fix Issue. Sign in with your Apple ID if it requires. 7: After, Select Apple TV from the drop-down menu on the Xcode window. 8: Now open iOS Signer App and from the drop-down menu, click on “Signing Certificate“. 9: Simply repeat the step for “Provisioning Profile” field and make sure the name is same as the name of your Xcode project. 10: Now you will be asked for the .deb Kodi file, by the “Input File“. Select browse and navigate to the file that you have downloaded earlier. 11: After filling up all the fields click ‘Start‘ for the iOS App Signer to create the IPA file to install it on Kodi. 12: In Xcode, Signingclick Window> Devices> Apple TV and click on ‘+’ button under the installed Apps. 13: Now search and click on the IPA file in the iOS Signer App to install Kodi on your Apple TV 4th generation. That’s it, Now you can launch Kodi on your Apple TV 4 and 4k.
How to Install Kodi on Apple TV 3?
Unfortunately, installing Kodi on Apple TV is not possible. Third-party applications on Apple TV 3 is strictly restricted and cannot be installed. But you can make it in another way. Install Kodi on your Mac and then mirror the app onto your Apple TV using Airplay. Anything that you stream on your Mac with your Kodi app will be shown onto your Apple TV.
How to Install Kodi on Apple TV 2?
Installing Kodi on the Apple TV 2 is much simpler than installing it on 4. The only drawback of this is that you won’t be able to install the latest version of Kodi. The below are the steps to install Kodi 17.3 Krypton on your Apple TV 2. 1: Enter the following command on your Terminal: “[email protected]” 2: Then replace “YOUR.ATV2.IP.ADDRESS” with your actual Apple IP Address. (You could be asked to enter a password; the default is alpine) 3: Now enter each of these commands in the following order: apt-get install wgetwget -0- http://apt.awkwardtv.org/awkwardtv.pub | apt-key add –echo “deb http://apt.awkwardtv.org/ stable main” > /etc/apt/sources.list.d/awkwardtv.listecho “deb http://mirrors.kodi.tv/apt/atv2 ./” > /etc/apt/sources.list.d/xbmc.listapt-get updateapt-get install org.xbmc.kodi-atv2reboot After your Apple TV reboots, the Kodi icon will appear on the Apple TV’s home screen. If you are not very familiar with the programming, Just make sure you are clear with the commands you type on the Terminal. After completing this, you should be able to watch all your favourite top channels without any hassle.
How to Install Kodi on Apple TV 1?
The first-generation Apple TV model comes with the built-in hard drive, makes it easier to save and store all your various files directly to the Apple TV. The installation process is very simple, you need to have the unused USB drive handy with the capacity of GB or higher. Disclaimer: The first generation of Apple TV models requires you to flash Kodi, You will lose all the existing features that you have saved. If you are okay with that, then follow the steps to setup Kodi on your Apple TV 1. 1. First, upgrade your Apple TV’s OS to run version 3.0.2. 2. Next, download the OSMC installer (Open Source Media Center) by going to the https://osmc.tv/download. (Note: It works on Windows and Linux.) 3. Once the installation completes, open OSMC. It is not an officially licensed app and a warning message appears upon opening. 4. Then connect the USB device to your computer, and select Apple TV from OSMC’s drop-down menu, and hit the forward arrow. 5. Now, select the most recent OSMC version which includes ‘USB’ at the end and hit forward. On the next screen, the OSMC will show you various download options, Just choose the ‘SD card’ option and hit forward. 6. Then select your USB-DISK location from the list, then check the box next to the user agreement, and begin downloading the OSMC on your USB drive. The whole process will take a few minutes. 7. Once the OSMC has been installed onto your USB, quit the installer, unplug your USB drive from your computer and plug it into your Apple TV. 8. Now, boot your Apple TV, If the OSMC was downloaded correctly, which should automatically start installing. 9. Now, use the Kodi on your Apple TV1. Note: If you are having trouble in getting Kodi to work on your Apple TV, then try changing your Apple TV’s settings: Go to Settings > Change the Audio & Video Settings, and set the HDMI output to RGB high.
Final Thoughts:
Kodi is the highly featured media player application, that is used by millions of people all over the world. Beware that streaming Kodi shows on your Apple TV through unofficial Kodi addons for movies and other stuff might draw unnecessary attention from your ISP, To avoid these kinds of issues just subscribe to a reliable VPN service as mentioned above and make sure that your privacy online is maintained. You can use Kodi for accessing almost all Movies, TV Shows, Animations, programmes, etc., Thank you for reading this post. You can share your suggestions and queries on the comment box below.